Send Data to Airtable
~ Airtable Plugin ~
What Does This Plugin Do?
Level of Difficulty: Medium
Compatibility: Chatfuel, ManyChat
Plugin Request URL
- Chatfuel: https://api.codelessbot.com/v1/chatfuel/airtable/write?accesskey={{cbot_accesskey}}&secretkey={{cbot_secretkey}}
- ManyChat: https://api.codelessbot.com/v1/manychat/airtable/write?accesskey=YOURACCESSKEY&secretkey=YOURACCESSKEY
Other Related Plugins
Example Use Cases
Record user information
Capture user information and details into a spreadsheet
Record Answers from a Form
Send data collected from a “form” to a spreadsheet for further analysis
How-To Setup the Plugin
Follow the 3 Simple Steps...or Login to CodelessBot to access the Plugin Wizard!
Step 1. Download & Install the Quick-Start Plugin Template
Login to CodelessBot, navigate to Templates on the sidebar and download the Quick-Start Template. Follow the prompt to install the Template. Next, you'll need to create a copy of the template for this specific plugin. See and follow the instructions below.
(If you've already install the Quick Start Template and created a copy of the plugin template - skip this step!
Chatfuel Instructions
a. From your Chatfuel dashboard, open the new bot called "JSON API Tutorial & CodelessBot Template"
b. Find the group containing the name of this plugin.
c. Click on the arrow next to the plugin name to clone this group and blocks from the template into your own Chatfuel Bot.
d. Navigate back to the Chatfuel Dashboard
e. Open your Bot and find the new plugin group that you just cloned.
f. Open the new Plugin block and enter in your CodelessBot access key and secret key.
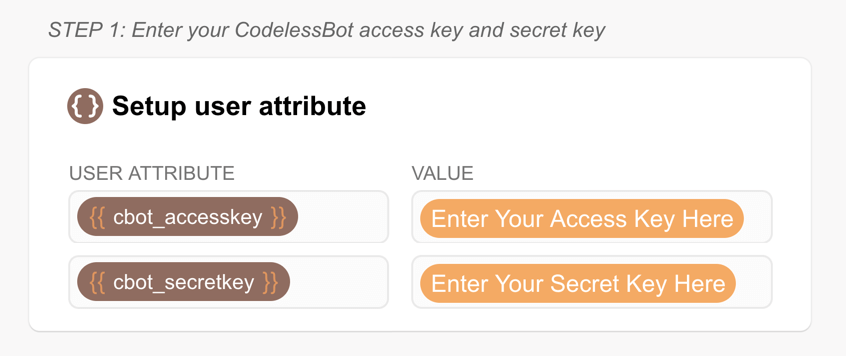
Tip: Rename the plugin block to something more meaningful. For more details, refer to the Getting Started Guide.
ManyChat Instructions
After you download and installed the Quick Start Template...
- From the ManyChat sidebar, click on the Flows"
- Open the folder "CodelessBot Templates"
- Find the flow containing the name of this plugin.
- Create a copy by click on the three dots icon on the right
- Then click on duplicate
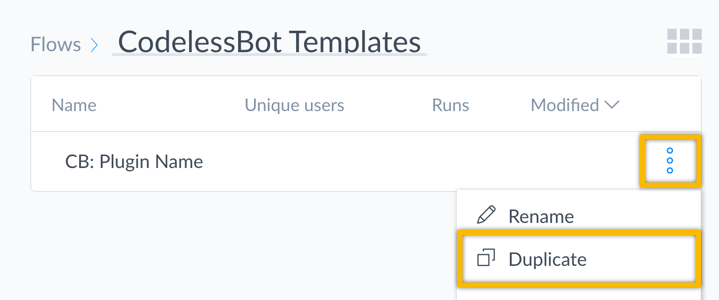
- Feel free to rename this new flow and move it to a different folder
- Open up the flow and click on the "Starting Step" to modify the information you'll be sending to CodelessBot
For more details, refer to the Getting Started Guide.
Step 2. Send information to CodelessBot
To quickly do this, use the to answer a few questions. It'll then generate the code with the information below for you to copy and paste into your bot.
cbot_apikey
The Airtable API key.
More Detail
To find your Airtable API key go to https://airtable.com/account
It should look something like keyXXXXXXXXXXX
cbot_table
The Airtable table name.
More Detail
You can find the table name up at the top. For example, in the screenshot below, the name of the table is “Table 1”.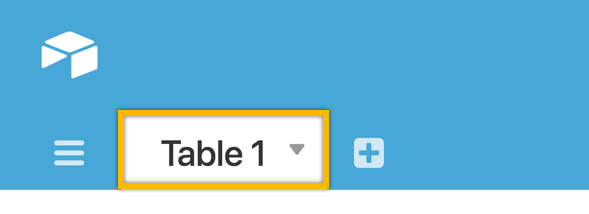
cbot_base
The Airtable base ID.
More Detail
- To find your Base ID, go to https://airtable.com/api
- From the list, click on your base.
- Then look at the URL, it should look something like: https://airtable.com/appXXXXXXXXXXXXXX/api/docs
- You’ll find your Base ID in the URL. It should start with “app” followed by a series of numbers and letters.
Attributes/custom fields to Send to Airtable
Enter any attribute or custom field you wish to send to Airtable.
More Detail
For Chatfuel the attributes you send to CodelessBot must have names that are identical to your Airtable fields; otherwise you may need to provide cbot_fieldmap to indicate how the different names are to be paired. It is highly recommended that you keep your attribute names the same as your Airtable fields to avoid additional complexity.
For example, if you want to store the value of the Chatfuel custom attribute “address” in the Airtable field “mailing_address”. Your options are as follows in the order of recommendation:
- Rename the Airtable field “mailing_address” to “address” so that the attribute and field names match each other.
- Set a second Chatfuel custom attribute called “mailing_address” with the value of {{address}}. Send the Chatfuel attribute “mailing_address” to CodelessBot.
- Set cbot_fieldmap. Send cbot_fieldmap and address as part of the JSON API data.
Chatfuel Instructions
- In this plugin block, scroll down to the "JSON API" card
- Copy and paste the code from the Plugin Wizard into the textbox. (Or you can enter the correct value by referring to the descriptions above.)
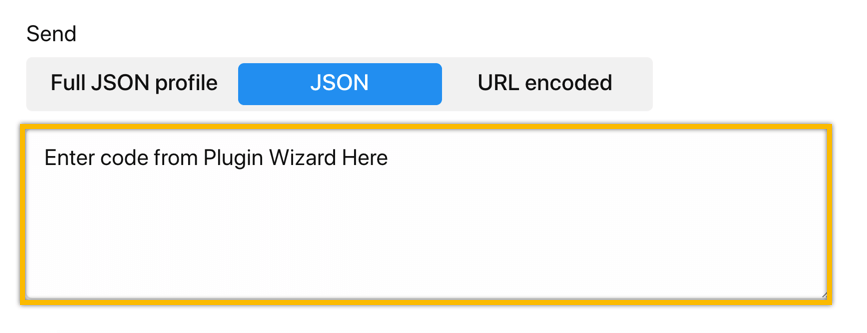
Tip: Make sure the "Send as" is set to JSON. Not URL encoded or Full JSON Profile.
ManyChat Instructions
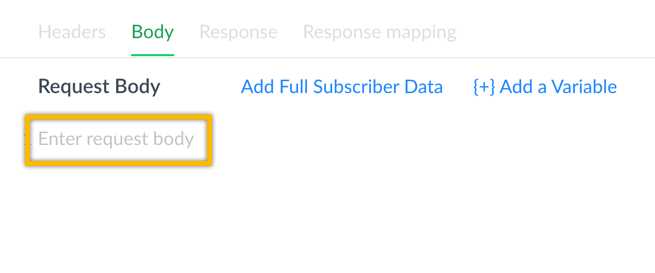
a. Click over to the "Body" tab in this external request 
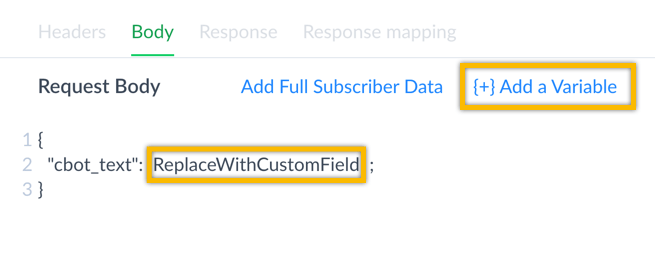
b. Next, copy and paste the code from the Plugin Wizard into the "Request Body". (Or you can enter the correct value by referring to the descriptions above.)
c. If there are any "Replace With placeholder" in the code, you'll need to replace them with the correct matching custom field by clicking on "Add a Variable".
d. To check if you set this up correctly, click on "Test the Request" on the right and you should get a success "200 OK" response
e. Click on the blue "Save" button
Step 3. CodelessBot will reply with the "answer"
CodelessBot will reply back with the following information:
cbot_rsp
The request ID (a unique tracking number) for your interaction with CodelessBot.
More Detail
This ID can be used to search your CodelessBot usage report to determine the result and any error details. In other words, you need this ID to help you troubleshoot errors and make sure the plugin is setup correctly. ; e.g 9ea33d4d-892a-11e8-bf9e-1d1d22908e28
The screenshot below is a Log report generated through the admin section of CodelessBot, https://m.me/codelessbot?ref=admin. It shows that request 4b5f72ab-8e0f-11e8-a351-edf425818bd0 encountered an error. The error message states that the required the attribute cbot_apikey was not sent.

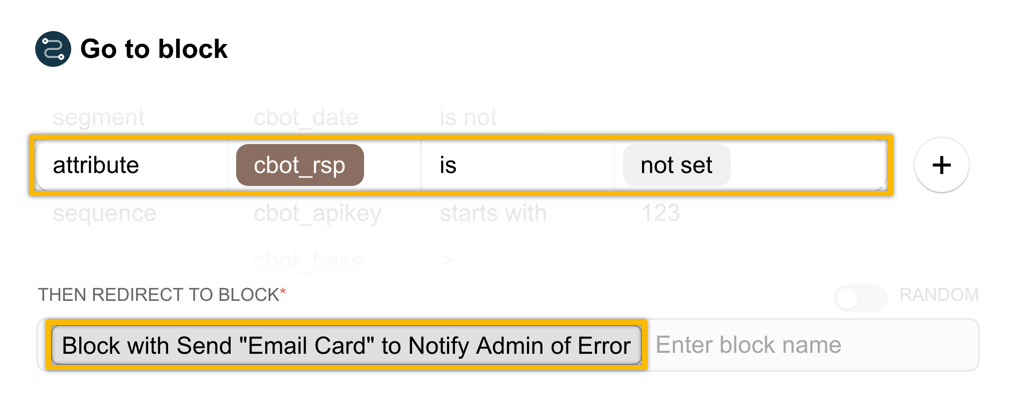
Chatfuel Instructions (Optional)
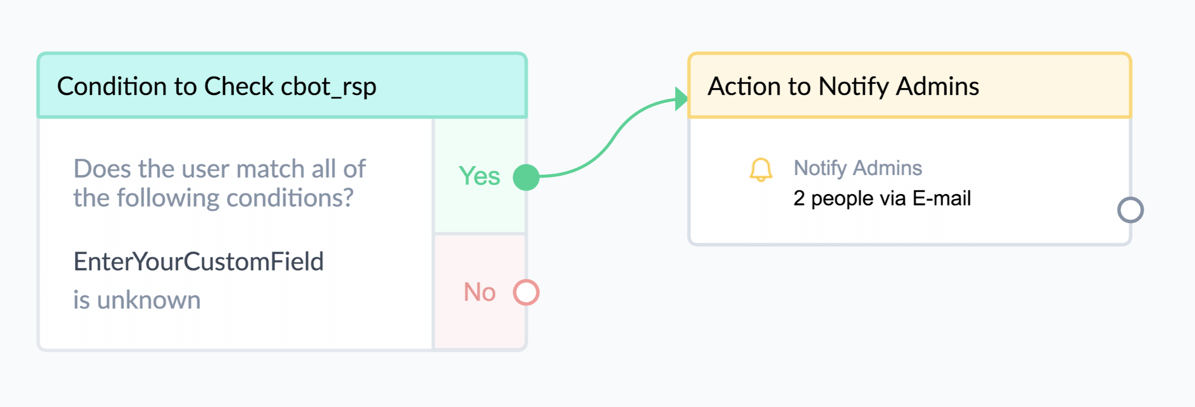
After the JSON API card, you can add a GoTo block to check if cbot_rsp is “not set” to notify system admins of the error.
ManyChat Instructions (Optional)
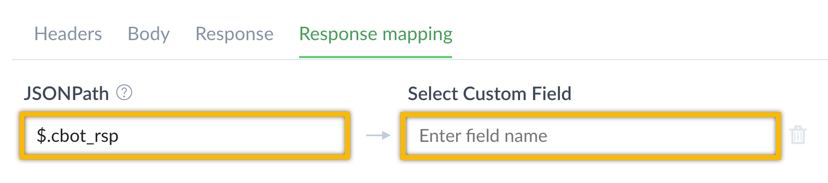
Finally, to save and make use of the result, you’ll need to map the CodelessBot response to a ManyChat custom field. To do this:
a. Click over to the “Response mapping” tab. CodelessBot will send back the result using the above temporary variable cbot_rsp. (For more detail see description above)

b. Select the ManyChat custom field you want to use to store cbot_rsp.
c. Click on “Save” when you’re done. After this external request step, you can add a next step where you’re using a condition step to check if the custom field is “unknown”. If it is unknown, you can trigger an action step where you’re notifying system admins of the error.
More Information
FAQs
1. What is the max number of fields I can send data for?
2. What is the max length for a field?
3. What type of setup is required in Airtable for integration with CodelessBot?
4. How long should it take for the data to appear in Airtable?
5. My data is not showing up in Airtable even though I get a cbot_rsp response with a request id. What's wrong?
Search the request-id column for matching request IDs. You should be able to find exactly 2 records. 1 record for an /airtable/write request which indicates that the request was received and 1 record for an /airtable/process-write request which indicates that an attempt was made to add the record in Airtable. If you can find both entries look at the error message for /airtable/process-write, it should tell you the cause of the error. An error is commonly caused by missing, incorrect, or invalid data; e.g. wrong credentials, wrong base identifier, wrong spelling of table name, wrong spelling of destination field, your value is text but your field only accepts numbers.
If you’re unable to find a matching /airtable/process-write record or do not understand the meaning of the error message please contact tech support.
6. How do I update an existing record in Airtable?
Enhance Your Bot with CodelessBot
CodelessBot plans start from $18/month